How I restored my DeLorean original leather seats.
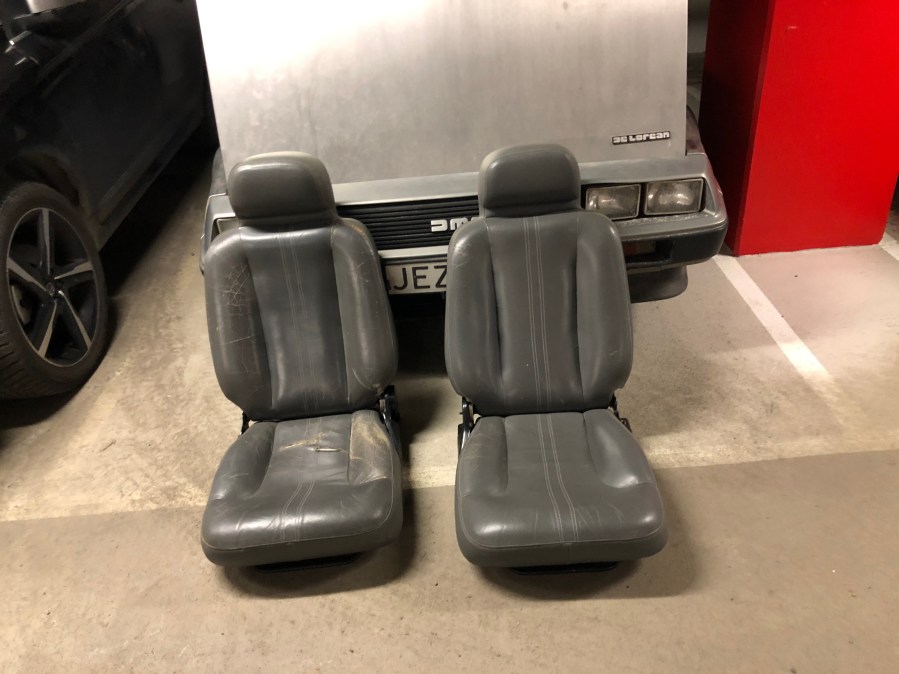
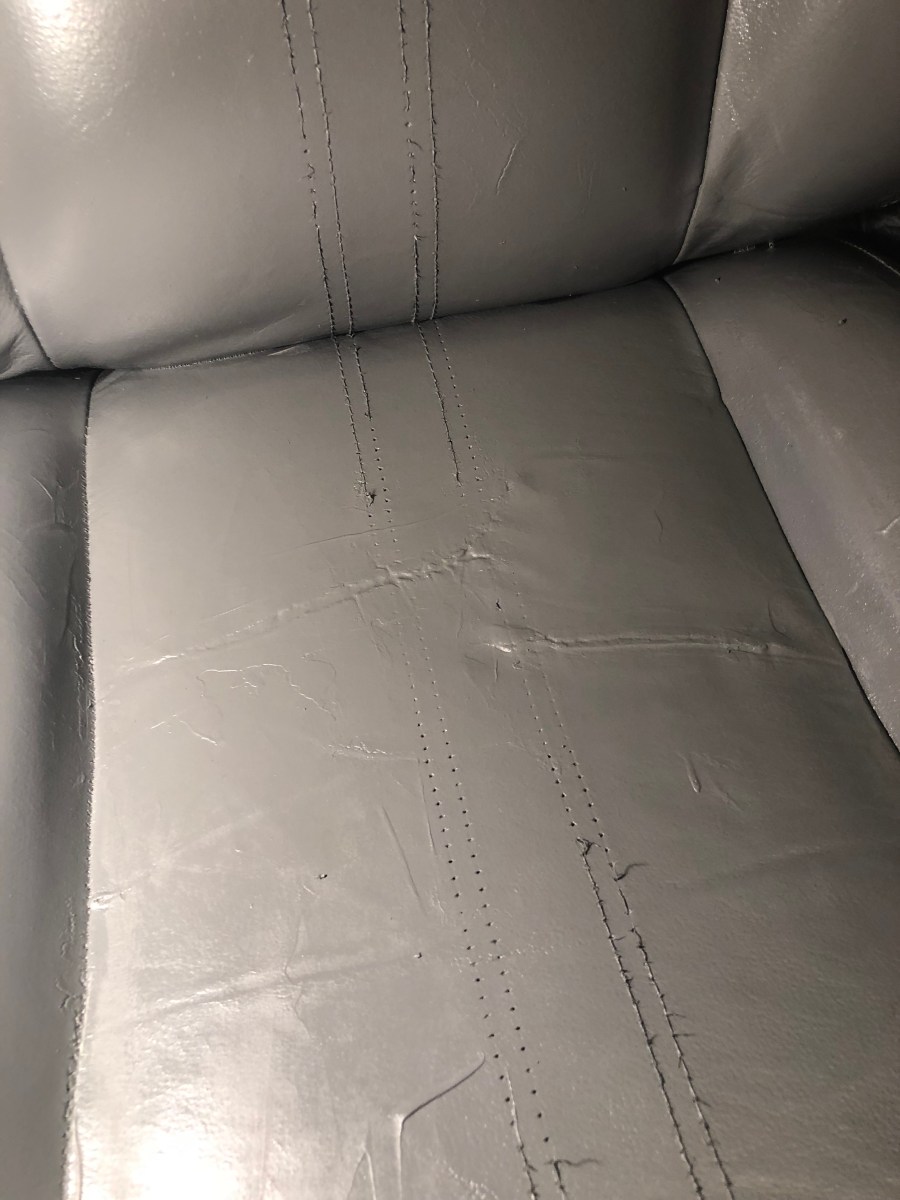
The seats of my DeLorean were in need of some love when I bought the car. There were a few rips in the the actual seat area of the drivers side seat, and the shoulder seam had opened about 2-3 cm/1 inch, like on many cars. It is where the sun hits the seats most. Also there were a lot of scuffs and scratches on both the upper and lower part of the leather. Even the vinyl was ripped at one place. (The seats are originally made of both leather and vinyl. The “seat” part of the seat is leather, both the lower, back and headrest area. The sides and the back are vinyl.
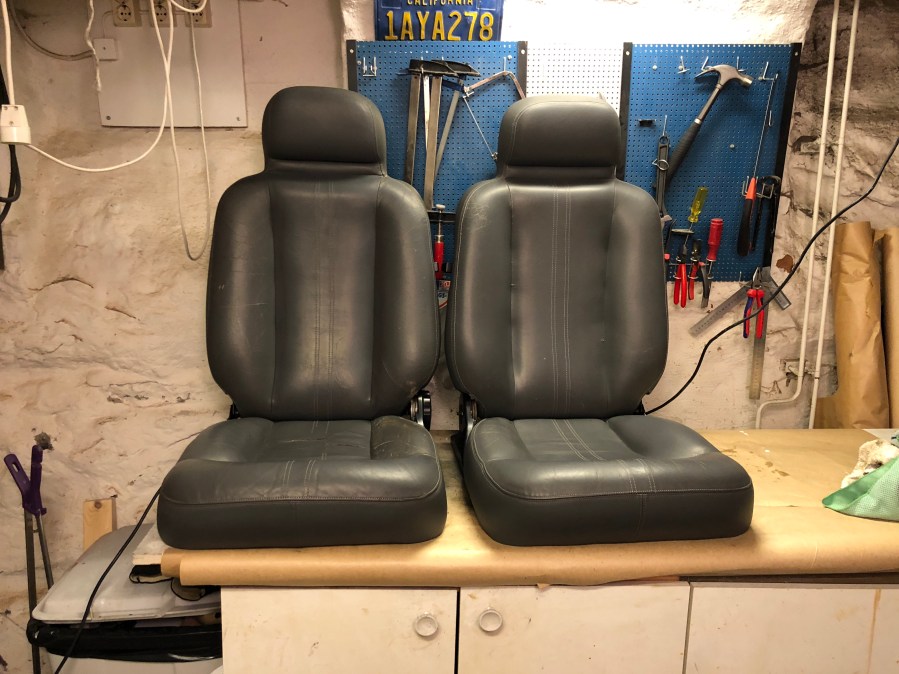
Here are videos of the finished result of both the driver side and the passenger side seats:
Below are pictures from the restoration with captions describing what is done in each step. Almost all products it comes from https://www.furnitureclinic.co.uk
Additionally i used som fine sand paper (800 grit), tweezers, a palette knife and several cloths of micro fiber.
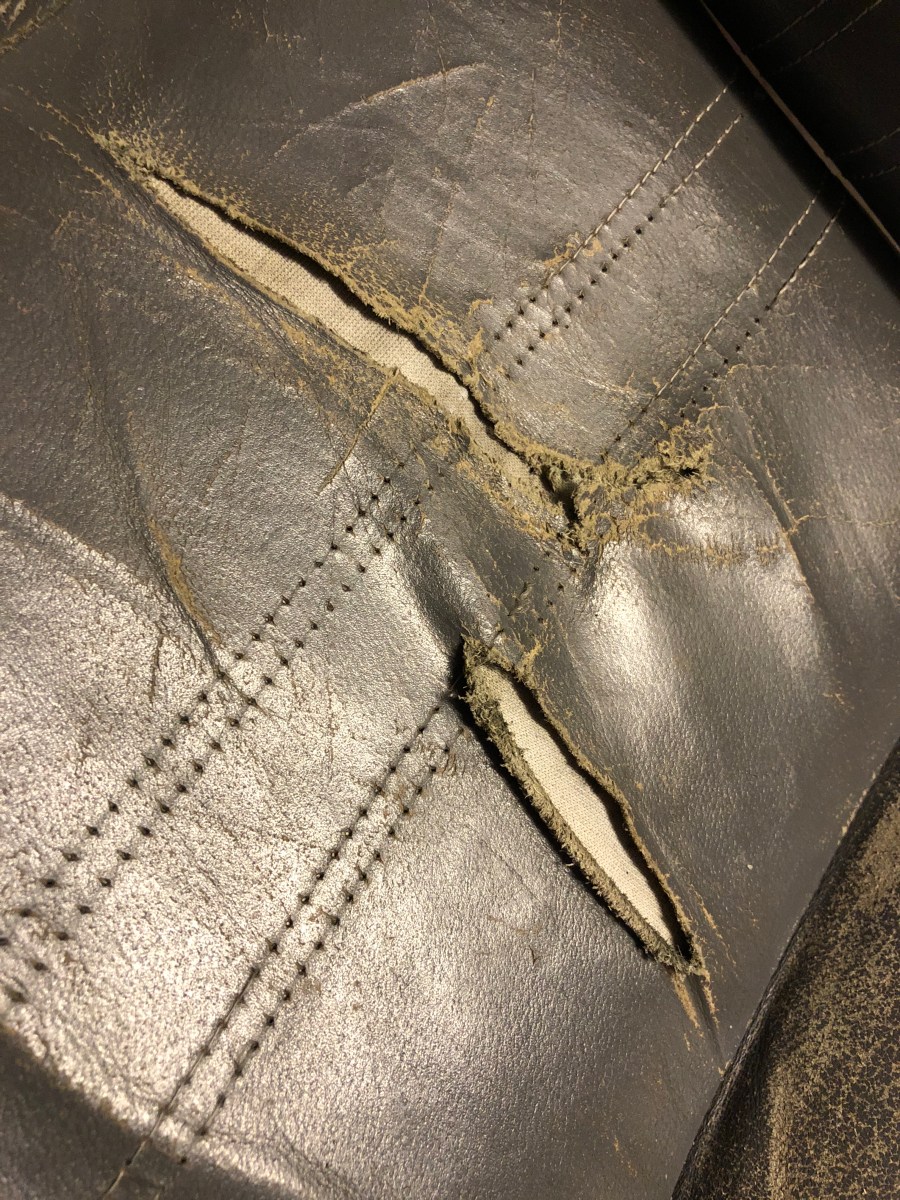
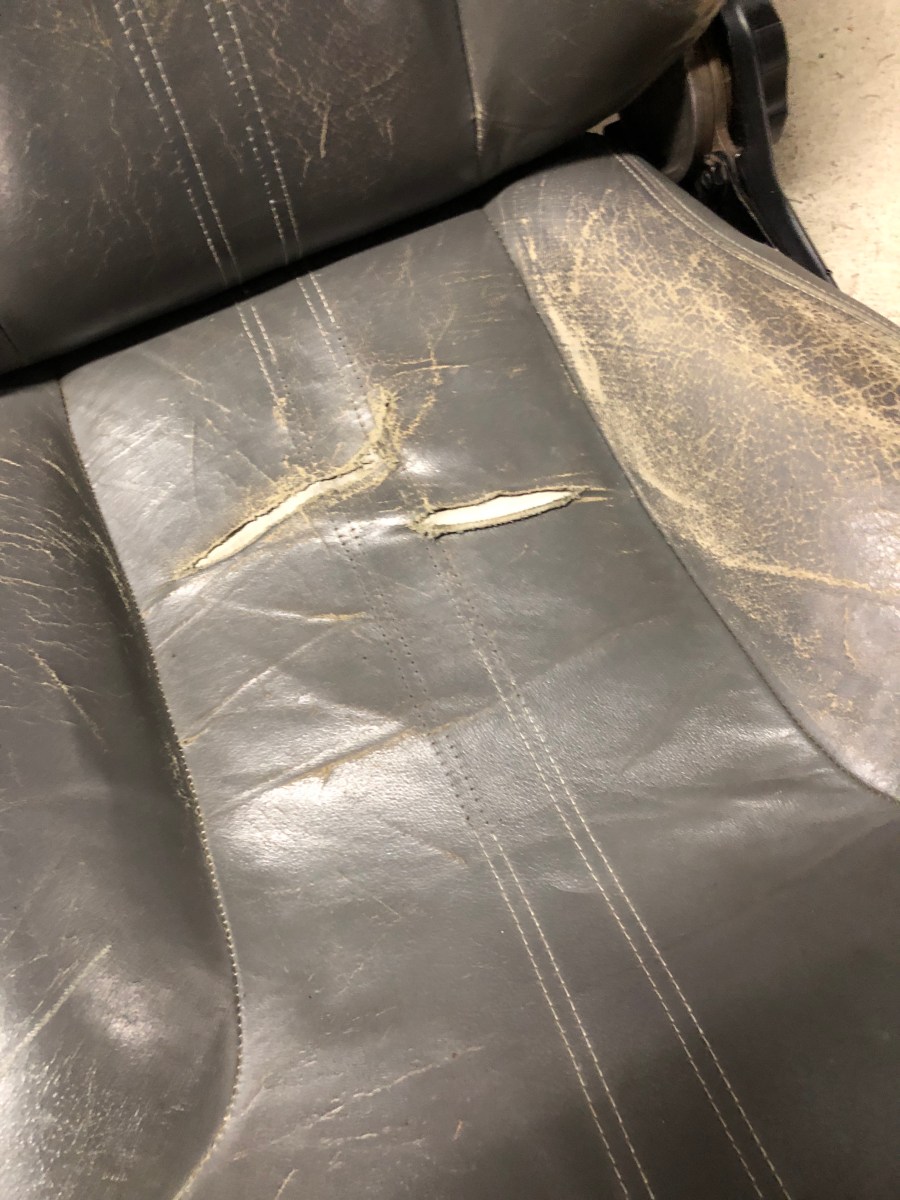
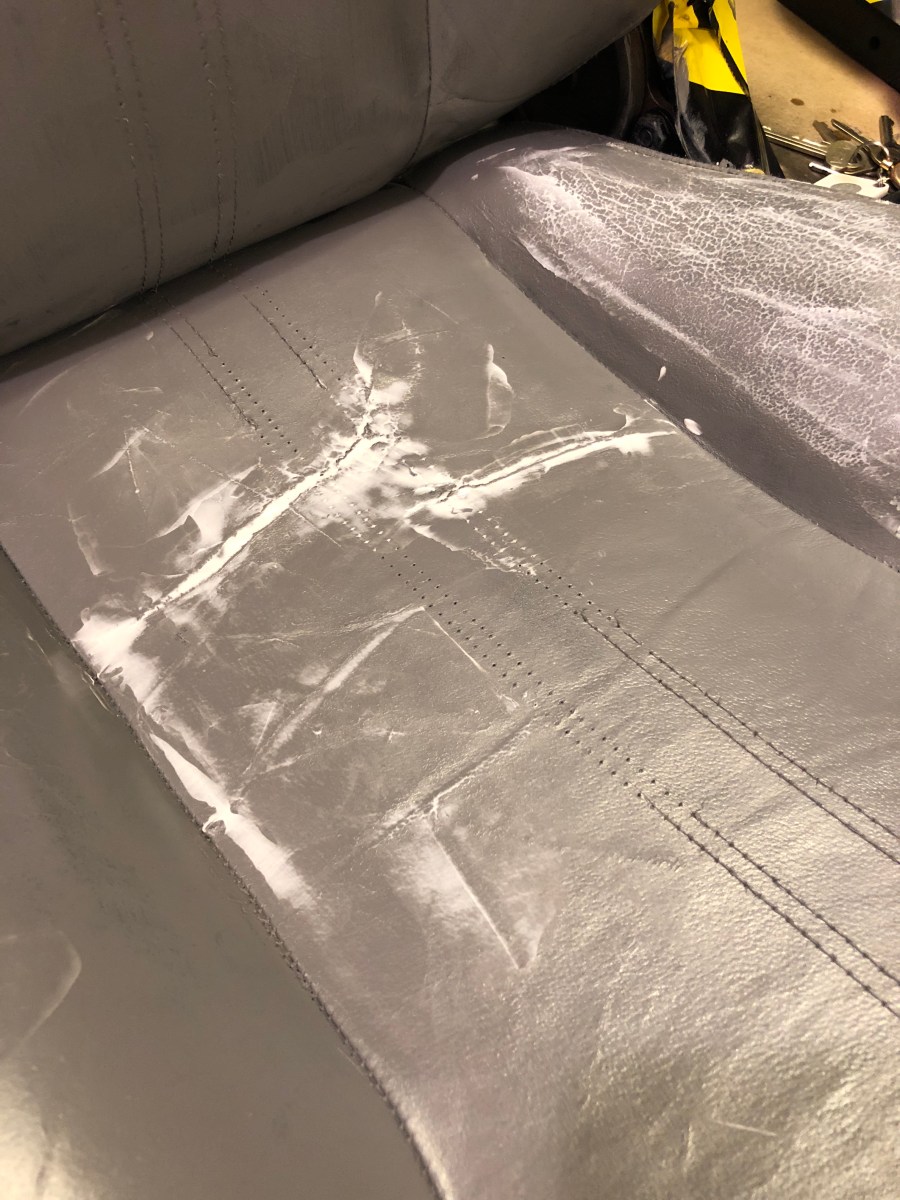
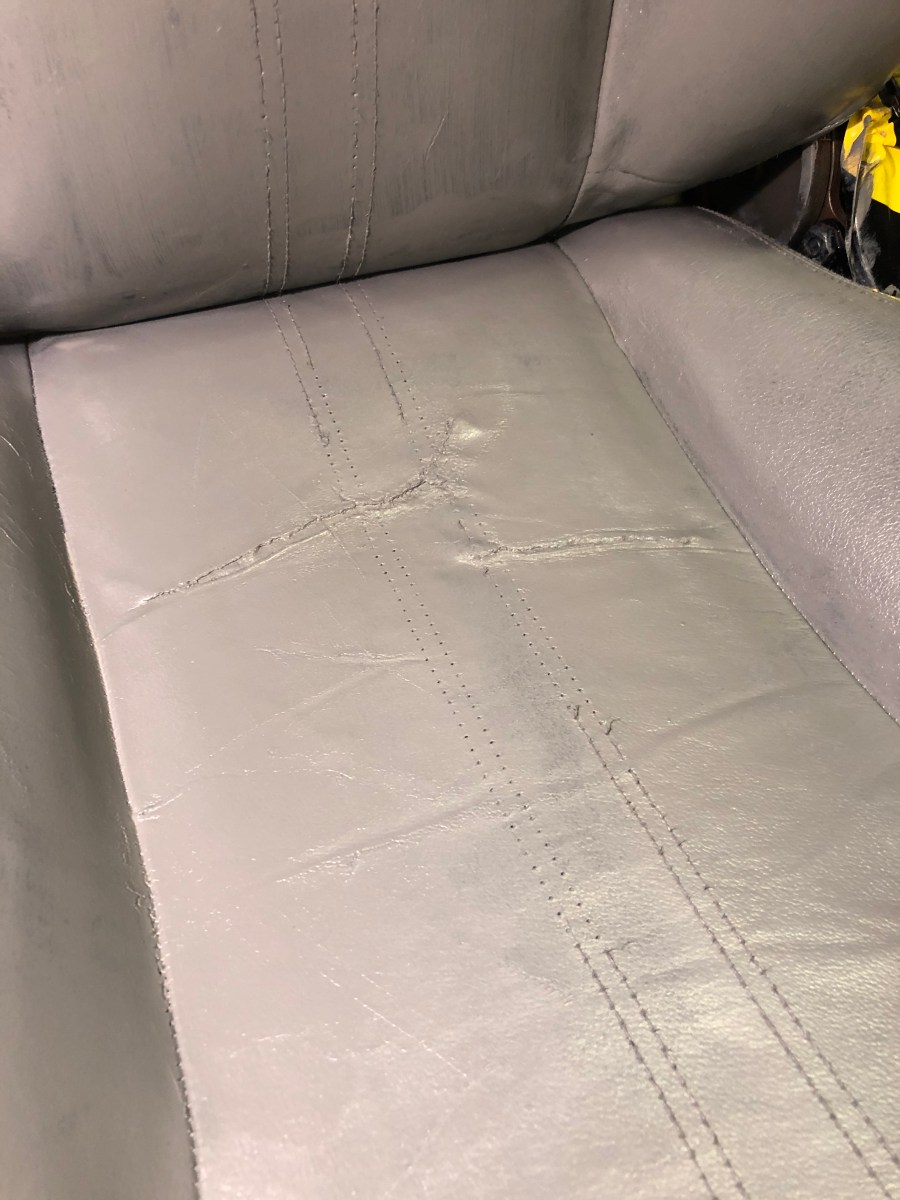
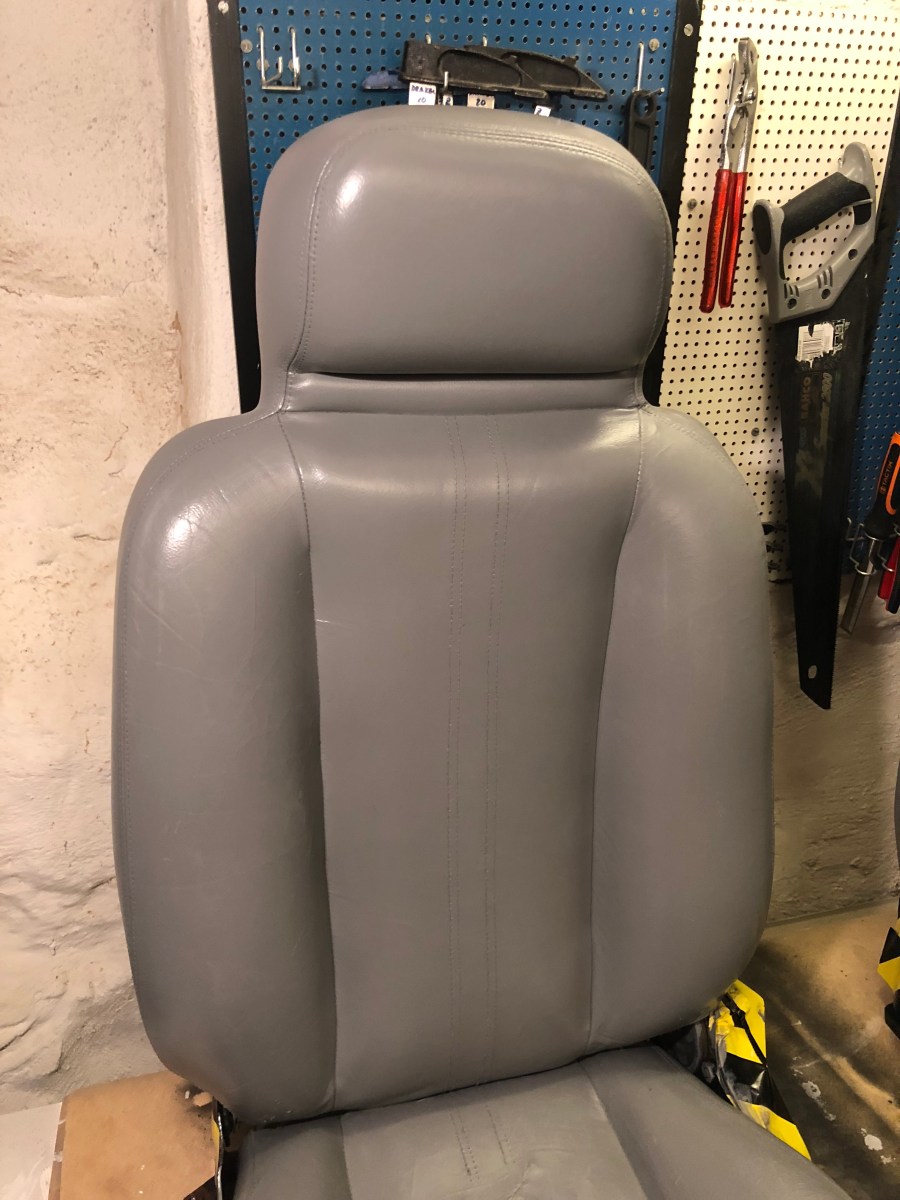
First you obviously need to take the chairs out. I managed to do it without even jacking up the car. Each chair is held down by 4 nuts. The bolts are welded on to the seat rails on which the seats slides back and forth, and go straight through the fiber glass body and the nuts can be fairly easily accessed from underneath the car. I just had to lie on the ground and reach in as as far as I could with a socket wrench.These are the largest cuts in the leather, its on the drivers side seat. Before attempting the restoration I watched numerous videos about furniture and car seat restoration, and learned that there actually are very specialised products for leather repair that should give a good result. Now, new seat covers are available from DMC and run about $600, I did the repair with products for about $100.This is a rip in the seam on the drivers side shoulder. It is a typical place for wear an tear where the sun hits the seat through the window. The part that appears lighter (it isn’t in reality) is the back of the seat, and is vinyl. The darker part is leather, where you can see cracks and scratches. I first thought I could repair this seam with needle and thread, but the leather and vinyl in the seam was to stiff. I decided to patch it up and glue it. First the seats needed to be thoroughly washed though.You need to wash out all old great and grime from the leather until the point where you are almost washing out the color. Leather is often dyed and then covered with a protective coat of polyutherane. You can start with a milder detergent and move to stronger if you need. I started with 303 all purpose cleaner, which is supposed to be a really good cleaner. It is surely more expensive than your general household cleaner but it did a good job on the worst dirt. I then continued with rubbing alcohol and micro fiber cloths in all cracks and seams, rubbing until the microfibre cloths came out clean. I then finished off with lacquer thinner which is a very strong solvent, strong enough to work as a primer on the leather, dissolving the coating and matting the surface. I also cleaned the vinyl parts. After the cleaning, I applied several coats of leather binder. It is a thin liquid that gets soaked up by the leather and reinforces it. It becomes very elastic and prevents the leather from cracking further. You are not supposed to apply the binder to the vinyl parts, only the leather.Here is the shoulder seam after i glued it. I could not get it to close completely, the seam stretched back even though i held it tight together, but it is better from before and hopefully I have stopped it from becoming bigger. I used a very strong leather glue called Kövulfix. It is available online, but I found it at a local cobbler in Stockholm. The plan is to fill the crack with leather filler before dying it.Here is another picture of the cuts in the drivers seat before i glued them the same way I did the shoulder seam. Usually you put a cloth underneath the crack, between the leather and the foam seat, so that you don’t glue the leather against the foam. It needs to be able to move around on top of the foam. My seats already had a layer of mesh underneath the leather, on top of the foam, so I glued the leather directly against that. Before you start dying, you need to prep the vinyl parts for the dye to stick. You mix an adhesive promotor with a hardener called cross linker x and apply to the vinyl. It creates a sticky surface, even once dried, which makes the dye attach to the vinyl.After I glued the cuts, I dyed the seat with one coat of dye. This makes the use of the filler in the next step easier to see.Next step is to apply the leather filler. The filler as well as the dye is very flexible, and cures with heat. It is water based to it shrinks somewhat when it dries so you may need additional layers. The curing can be sped up with a hair dryer or hot air gun. Be very careful with the filler and only apply it in the cracks. remove all excess before it cures, otherwise you have to sand it down.These are the cuts once glued, dyed and with filler applied. I added some more filler before I dyed again. All in all it takes 3-4 coats of dye to get an even color.Here you start to see the final result. The dye gets more even, and even if you still see some cracks, you can barely feel them with your hand. After the final coat of dye, you apply 1-2 coats of leather finnish to add a protective layer. The Finnish also determines the shine of the end product, i went with ‘Semi Matte’. If you mix it with the hardener (cross linker X) you get an even tougher finish.